Instagram Highlights are a fantastic way to showcase your best stories and keep them accessible for your followers long after the 24-hour limit has passed. Whether you’re a brand, influencer, or casual user, mastering Instagram Highlights can significantly enhance your profile’s engagement and visual appeal. This comprehensive guide will walk you through the process of adding Highlights on Instagram in 2024, offering practical tips and tricks to make your content stand out.
Understanding Instagram Highlights
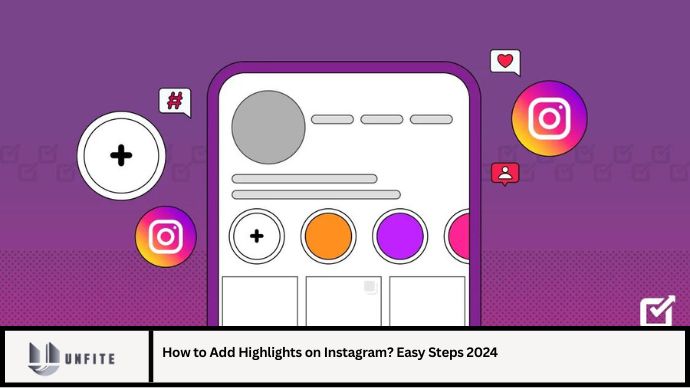
Instagram Highlights are a feature that allows users to save their Instagram Stories to their profile permanently. Unlike Stories, which disappear after 24 hours, Highlights remain on your profile until you choose to remove them. They are displayed as circular icons below your profile bio, making them easily accessible for your followers.
Why Use Highlights?
- Showcase Key Moments: Use Highlights to feature important stories, such as product launches, events, or personal milestones.
- Enhance Profile Aesthetics: Create a visually appealing profile by organizing Highlights with consistent cover images and themes.
- Boost Engagement: Well-curated Highlights can attract more interaction from followers and potential customers.
How to Add Highlights on Instagram: A Step-by-Step Guide
Step 1: Create an Engaging Story
Before you can add a Highlight, you need to have an Instagram Story. If you don’t have one yet, follow these steps to create one:
- Open Instagram: Launch the Instagram app on your mobile device.
- Create a Story: Tap the camera icon in the top-left corner of your feed or swipe right from anywhere in your feed.
- Capture or Upload Content: You can take a new photo or video, or upload content from your gallery.
- Edit Your Story: Add text, stickers, filters, and other effects to enhance your Story.
- Post Your Story: Tap “Your Story” to publish it.
Step 2: Save Stories to Highlights
Once your Story is live, you can add it to a Highlight:
- View Your Story: Tap on your profile picture or go to the Stories section of your feed to view your Story.
- Select the Highlight Option: Tap the heart icon (or “Highlight” icon) at the bottom-right corner of the screen.
- Create a New Highlight: If this is your first Highlight, tap “New.” Enter a name for your Highlight and choose a cover image.
- Add to an Existing Highlight: To add your Story to an existing Highlight, select the desired Highlight from the list and tap “Add.”
Step 3: Customize Your Highlights
To make your Highlights stand out, consider these customization tips:
- Choose Eye-Catching Covers: Create custom cover images for your Highlights. This helps in maintaining a cohesive look on your profile. Use graphic design tools like Canva or Adobe Spark to create professional-looking covers.
- Organize Strategically: Arrange your Highlights in a logical order. For instance, group related Stories together or use categories like “Travel,” “Reviews,” or “Tips.”
- Update Regularly: Keep your Highlights current by updating them with new content or removing outdated Stories.
Step 4: Manage Your Highlights
Managing your Highlights is crucial for maintaining an attractive and organized profile:
- Edit Highlights: To edit a Highlight, tap and hold the Highlight on your profile. Select “Edit Highlight” to change the cover image, title, or Stories included.
- Delete Highlights: If you need to remove a Highlight, tap and hold the Highlight, then choose “Delete Highlight.” Note that this will remove the Highlight from your profile but not the Stories from your archive.
Step 5: Promote Your Highlights
To maximize the impact of your Highlights:
- Feature Important Information: Use Highlights to prominently display important information such as promotions, FAQs, or tutorials.
- Engage Your Audience: Regularly update Highlights with fresh content to keep your audience engaged and informed.
- Cross-Promote: Share your Highlights in your Instagram feed or other social media platforms to drive more traffic to your profile.
Tips for Creating Effective Instagram Highlights
- Consistency Is Key: Maintain a consistent visual style across your Highlights to enhance your profile’s aesthetic appeal.
- Be Selective: Focus on quality over quantity. Choose only the most relevant and engaging Stories for your Highlights.
- Use Analytics: Monitor the performance of your Highlights using Instagram Insights to understand what content resonates best with your audience.
Conclusion
Adding Highlights on Instagram is a powerful way to showcase your most memorable Stories and enhance your profile’s appeal. By following these easy steps and implementing effective strategies, you can create engaging and visually appealing Highlights that captivate your audience and boost your Instagram presence. Stay updated with the latest trends and continuously refine your approach to ensure your Highlights always reflect the best of your content.
FAQs
1. How long do Instagram Highlights stay on my profile?
Instagram Highlights remain on your profile indefinitely until you choose to delete them.
2. Can I change the cover image of a Highlight?
Yes, you can edit the cover image of a Highlight by tapping and holding the Highlight and selecting “Edit Highlight.”
3. How do I remove a Story from a Highlight?
To remove a Story from a Highlight, tap and hold the Highlight, select “Edit Highlight,” and then deselect the Story you wish to remove.
4. Can I add Stories to a Highlight after 24 hours?
Yes, you can add Stories to Highlights at any time, even after the 24-hour expiration of the original Story.
5. How many Highlights can I have on my Instagram profile?
You can have up to 100 Highlights on your Instagram profile, though managing fewer, more relevant Highlights may be more effective.